
FM8 Tutorials
CREATING NOISE RISER EFFECT IN FM8
Today we will be making simple and basic filter sweep in FM8.
Because of it’s flexible and easy to control envelopes FM8 is a great tool for creating filter sweeps and similar effects . It offers very precise control over the envelope slopes which is very important with such effects.
CREATING A NOISE SWEEP
First we will look into creating a simple 4 bar long noise sweep.
We only need white noise source and an amplitude envelope to control noise loudness.
Draw a single, four bar long midi note in your host. It doesn’t matter on which note it sits since we will be using noise as our sound source anyway.
Go to FM8 operator matrix.
Deactivate the F operator which is routed to audio output by default.
Right click on X module to activate it and set it’s audio out level to 100.
Raise the Amp parameter which controls the loudness of the noise signal to 100. You should hear loud noise by now.
Adjust the Cutoff control of the LP filter section to control the desired high frequency content of your noise signal. I have set it to it’s fullest value.
Set saturator Level parameter to 37.
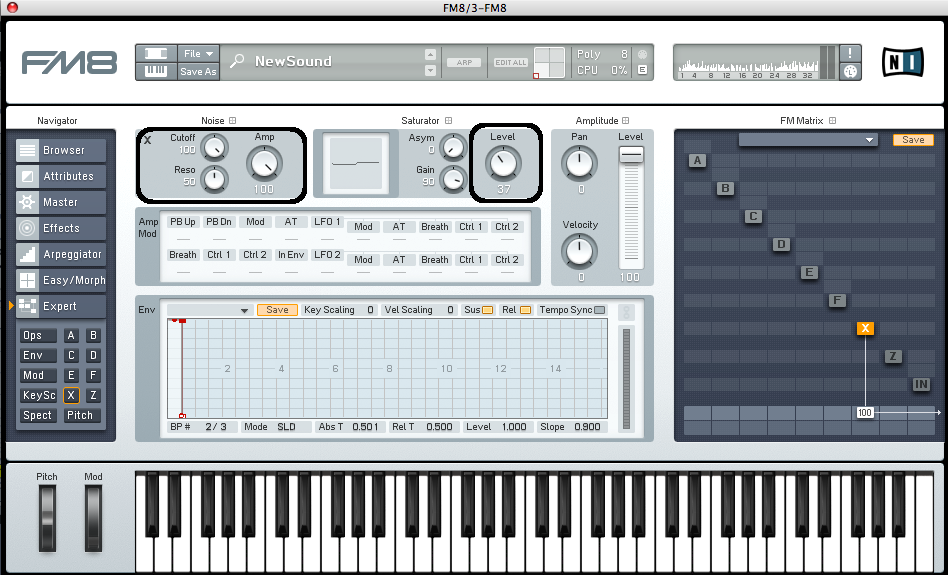
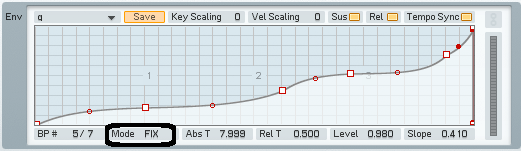
Below you see envelope which controls the amplitude of this module.
We want to adjust the envelope to exact 4 bars length so we have precise timing control of our riser effect.
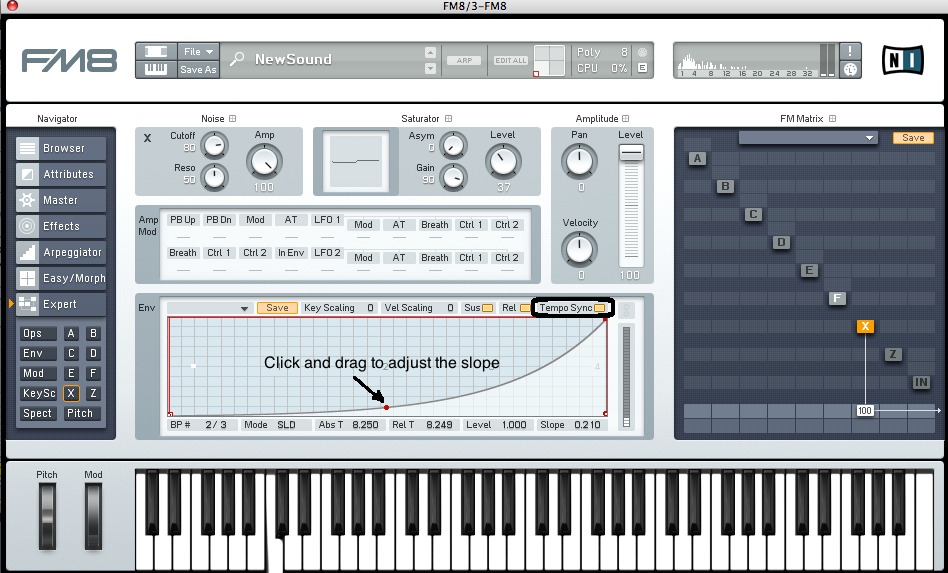
Click to Tempo Sync which ties envelope to hosts tempo.
Each number represents the length in rhythmic values. You can change the resolution by clicking in the empty space in the envelope display and dragging the mouse up or down.
Drag envelope over four bars and adjust it to slowly rise to its maximum level.
If you see only no integer numbers you have to click in the empty space of envelope region and drag upwards or downwards to get displayed whole, integer numbers which represent rhythmical values in bars.
If you double click in the empty space, you can resize the view region of the envelope to fit the whole envelope length in as you can see in the picture below.
You can adjust the slope of the envelope by dragging a small circle between breakpoints which changes the line’s slope between the breakpoints from concave over linear to convex.
CREATING FILTER BASED NOISE SWEEP
Now we will make filter based noise sweep.
We will use the same module as our source signal but for creating the rising effect we will use filter frequency sweep this time.
Deactivate module X audio output and route it to module Z.
Activate module Z by right clicking on it and set it’s audio output to 100 like in the picture:
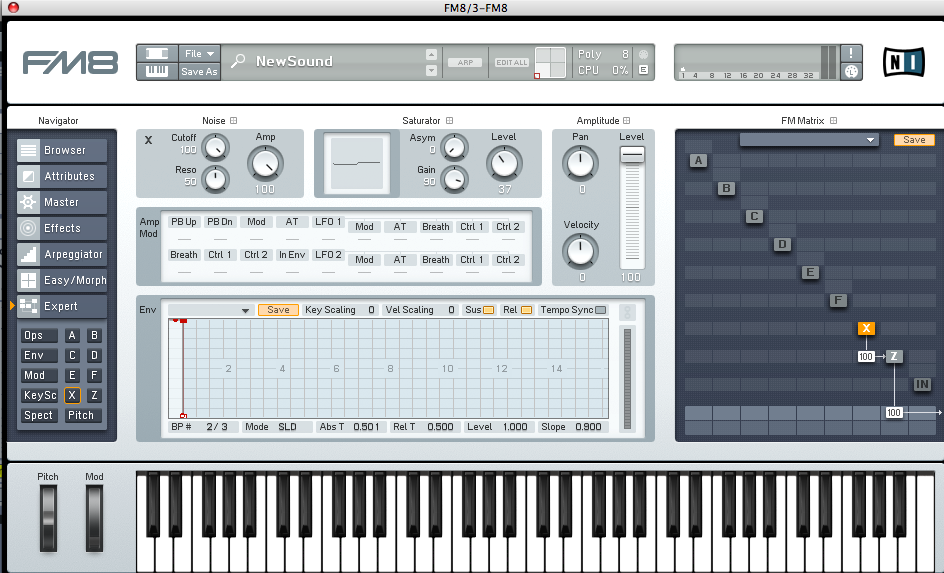
In module Z you see the filter control section and the envelope below controls the cut off frequency of our two filters.
The amount with which the cutoff is affected by envelope is set by Env Amt control. Set to to its fullest value for now.
Change the Routing Mix control to filter 1 only.
The filter 1 and 2 are already set to low pass mode.
If you want for filter sweep to start from silence, set the cut off control to zero.
If you want more gradual and longer noise sweep which doesn’t start from silence, set the cut off to higher value.
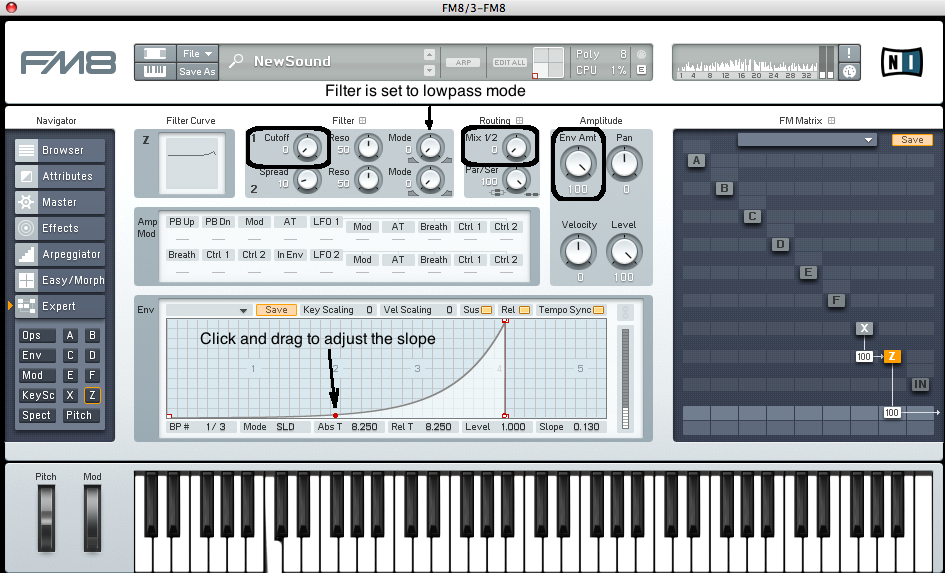
Here is what we have for now:
To get even more gradual rising slope of the filter cut off envelope you need to create additional breakpoints and adjust it’s slopes.
You can do that by right clicking on the envelope and new break point is created.
Now adjust slope to fit the level of the previous break point section.
Also in order to lock the envelope to it’s 4 bar length you should choose the Mode: Fix option in the envelope control section so you can more easily adjust each break point without changing the envelope’s overall length.
This offers very precise control over the slope of the envelope.
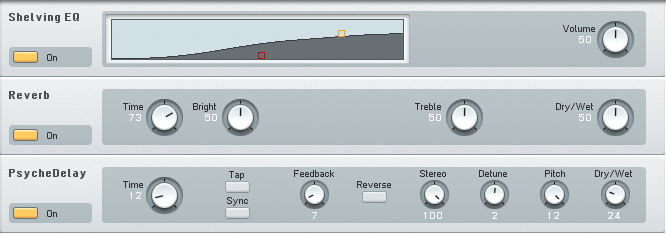
In the effects section add shelving EQ to remove low frequency content in our sound.
Also add reverb and delay to create some ambiance and stereo spread.
Here are my settings:
For now we have a simple noise filter sweep.
In order to make it into something more interesting try readjusting the module X noise and saturator section controls.
Start with lowering cut off of the module Z to 40 and raising resonance to 100.
This way can get some interesting sounds.
Also experiment with different module Z filter settings.
Here are few examples:
[audio:https://www.fm8tutorials.com/wp-content/uploads/2012/02/FM8-riser-tutorial-audio-examples.mp3|titles=FM8 riser tutorial audio examples]In part 2 of the FX series we will be creating pitch riser effect.
Have fun!
What do you think of this tutorial – has it helped? Have you used it in your own track?
Post a comment or a link to your track!
