
Kontakt Tutorials
Creating Kontakt Instruments for Beginners
Instruments in Kontakt are the basic building block of all sound in Kontakt and there are many ways to create them. But instruments are also made up of smaller pieces called groups and even smaller are the zones. In today’s tutorial we will talk about creating Kontakt Instruments for Beginners, creating and editing zones, creating and editing groups and using Instrument InsertFX.
First, open Kontakt in standalone mode or add a instance of Kontakt in your DAW. Once opened, you can create an instrument by double clicking or dragging a sample from the Kontakt browser,
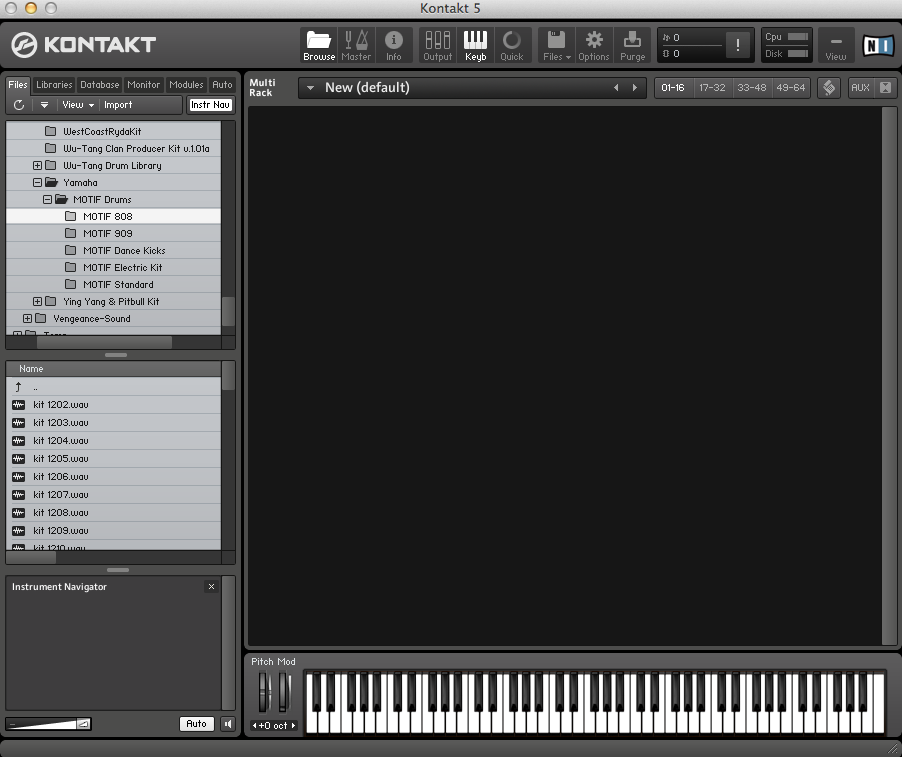
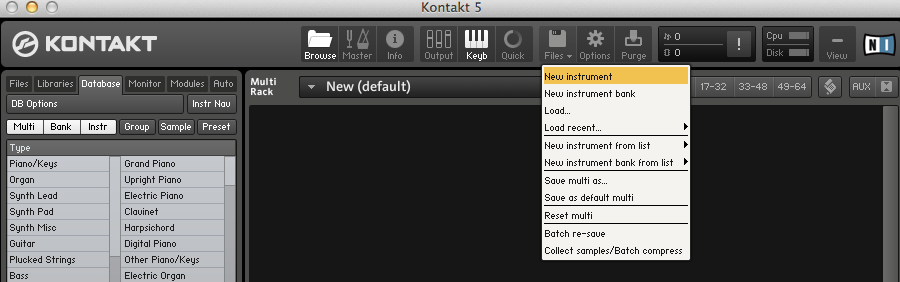
dragging a sample from your desktop into the empty Kontakt rack or Files>New Instrument (in Kontak’s Main Control Panel).
Click the instrument edit button (wrench icon) to enter rack instrument edit mode.

Now let’s add some samples to our new instrument.
Click on the Mapping Editor button to open the Mapping Editor. And in the browser, navigate to a folder with some samples you want to add to your instrument. Drag the sample into the Zone Grid of the Mapping Editor. A highlighted region will tell you where the zone will be created on the keyboard. When you release the mouse button, the zone(s) will be created. If you want to cancel, just move your mouse outside the mapping editor and release the button to cancel.
Tip: You can also drag samples from explorer (WIN) or Finder (Mac).
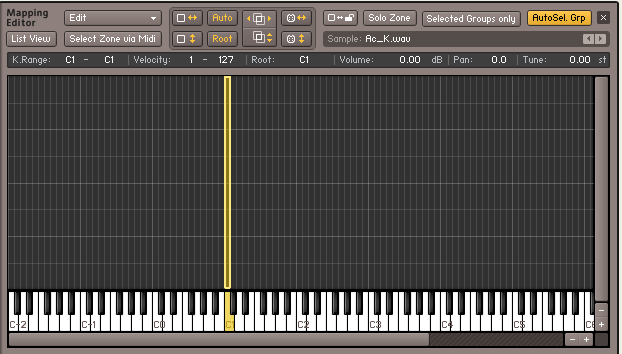
If you drag a single sample into the zone grid, a zone that spans the entire velocity range and on one or more adjacent keys will be created. If you move your mouse all the way to the bottom of the grid, a zone will be created on a single key. If you move your mouse upwards, it will will gradually enlarge the keyboard range of the zone until it spans the entire keyboard when you get to the top of the grid.
If you drag multiple samples into the zone grid, a corresponding number of zones that evenly divide the velocity range on that key will be created. And just like single samples, mouse position will determine the size of each zone’s key range. If you move your mouse all the way to the top of the grid, samples will be layered in overlapping zones that span the whole key range.
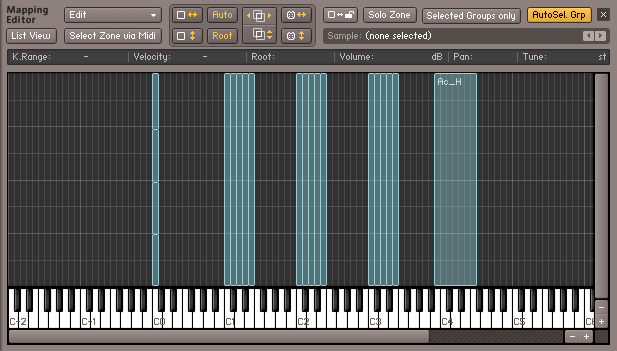
Tip: When dragging multiple samples, the sort order of samples in the browser will determine the order in which corresponding zones will be created.
After you create your zones, you can edit the keyboard range by shrinking or enlarging the zone horizontally. You can also change the root by selecting the zone and dragging the highlighted key to the desired root note. and to change the velocity range, shrink or enlarge the zone vertically.
Tip: Enable ‘Select Zone via Midi’ to select the active zone with your midi controller
You should now be able to play the samples by pressing the corresponding notes on your midi controller. If Kontakt is not responding, make sure that your mid controller is setup properly in Kontakt or in your DAW.
When you create zones they are all in the same group by default. Groups allow zones to use a common signal path, they allow you to define the conditions in which zones will be played, they allow you to adjust the zones voice allocation and they provide a way to edit multiple parameters at the same time. Let’s move our newly created zones into separate groups..
Click on the Group Editor button to open the Group Editor. In the Mapping Editor, select one or more zones that you would like to assign to a group. In the Mapping Editor, select Edit>Move Zone(s) to New Empty Group.
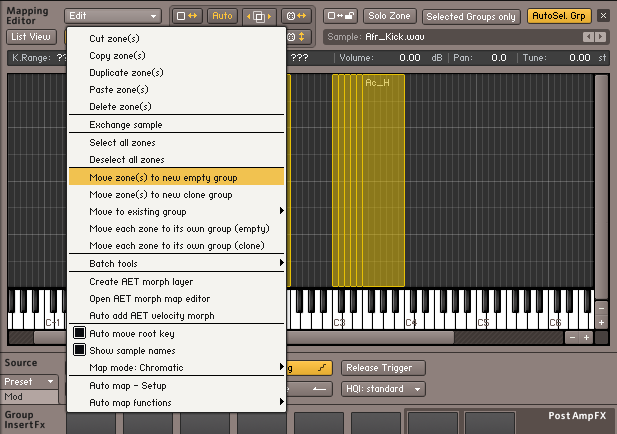
Repeat for the rest of the zones that you would like in their own group.
Tip: Groups can be exported and imported to your hard disk
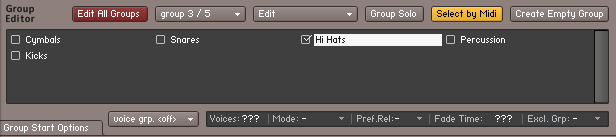
In the group editor disable ‘Edit All Groups’ to prevent any unwanted parameter changes to other groups. Enable it when you want to change parameters of all groups at the same time.
Rename each group to something meaningful by double clicking on the group name in the groups list.
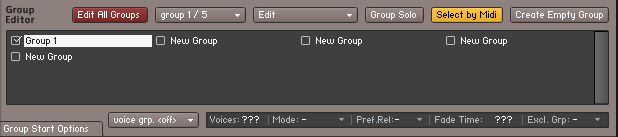
Tip: Enable ‘Select by Midi’ to select the active group with your midi controller
So we have playable instrument with zones in groups. Let’s add some effects to make to make it interesting.
In the Instrument Insert Effects, click on the + in the first slot. Choose EQ>3-Band EQ. In the 3-band EQ, adjust the parameters to your liking or select a preset using the preset chooser.
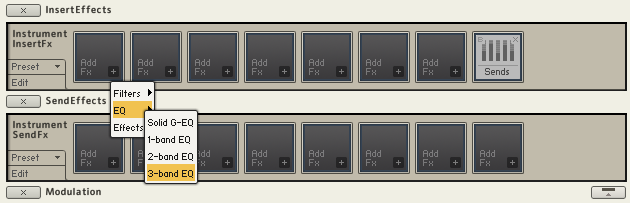
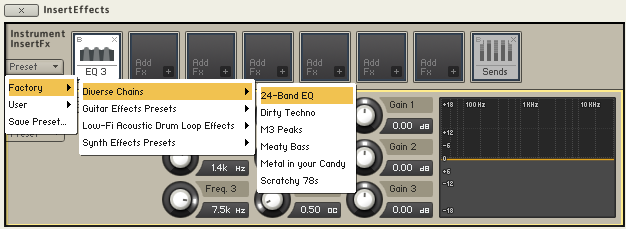
The Group InsertFx and the Instrument InsertFx in Kontakt are processed in the order in which they are placed in the chain, left to right. These effect chains can be saved as presets and used in other instruments. Try out some of the factory presets to get some ideas.
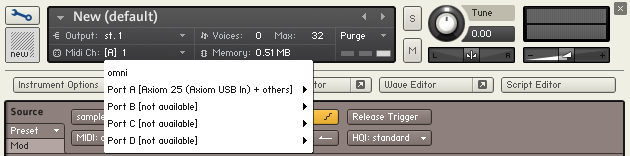
Kontakt is a mult-timbral, multi-output and multi-port virtual instrument. We can change each of our instruments to respond on all Midi Port/Channels or a specific Midi Port/Channel. We can also change the channel output of the instrument. Let’s change both of these Instrument settings now.
To change the Instrument’s output, click the output name in the instrument header to open a drop-down menu with all of the currently defined output channels. Choose an output that you would like the instrument to send audio out of. The available outputs will be determined by your sound card or DAW settings.

To change the Instrument’s Midi Port/Channel, click the midi port name in the instrument header to open a drop-down menu will all of the available Midi Ports/Channels. Choose a port/channel that you would like the instrument to respond to incoming Midi. Kontakt supports four Midi Ports (A-D), each having 16 channels. Kontakt also supports ‘Omni’. Choose ‘Omni’ if you would like the instrument to respond to any Midi Port or channel.
As you can see, it is quite easy to create and configure instruments in Kontakt. But there is a lot more functionality of Kontakt that we have yet to tap into. We touched on the Mapping Editor, the Group Editor, Effects and Instrument Header, but this is just the tip of the iceberg. In later tutorials we will delve more into the intermediate and advanced features.
