Reaktor Tutorials
Bandlimited Square and Triangle Oscillators
After my previous tutorial, Errorsmith wrote in with a fix to the structure that allowed for pitch sweeps. I won’t be using that structure for today’s tutorial, but I will mention here that you could easily substitute in his modified structure for mine for the purpose of today’s tutorial. In general, if you plan on modulating the pitch, his version is probably a better choice. I had an idea for a fix that would add similar functionality but his way is more elegant so I would suggest using that.
BUILDING A PULSE OSCILLATOR
The most commonly solved bandlimited oscillator is the sawtooth. I’m not sure of the reasons behind this, but it is possible to build other waveforms using a sawtooth as a building block. In fact, I’ve yet to see a bandlimited pulse or triangle oscillator that did not depend on first building a sawtooth.
A method I have found for building pulse oscillators is to use a pair of sawtooth oscillators running at the same frequency, but with different phases. Subtract one sawtooth from the other and you’re left with a pulse wave! The difference in phase becomes the width of pulse. Here’s what such a structure looks like in primary:
This results in a standard square wave:
Of course, there are far more efficient way to achieve this in primary, I only provide this structure as an example. Fortunately, the same design works perfectly with our BLIT design from before. We can use a single phase accumulator to run two BLITs – one is offset by an amount, W, that creates the width of the pulse. W can range from 0 to π.
This structure creates an interesting pulse shape:
Fortunately, the spectral data is very similar to a ‘normal’ pulse wave, however:
In fact, except for the frequencies above 18,000, they look identical as far as I can tell.
BUILDING A TRIANGLE OSCILLATOR
Once we have a pulse oscillator built, we can move on to the triangle oscillator. A basic triangle shape can be made out of integrating the output of a pulse wave. For more on integration, please check out the 2nd tutorial of this series.
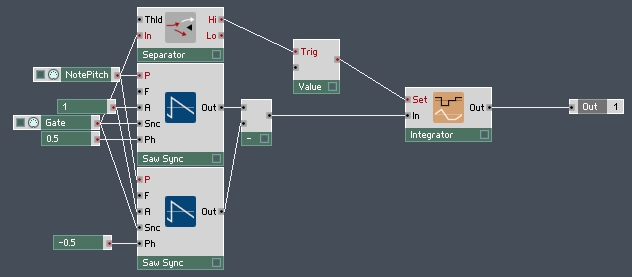
For example, we can modify the Primary pulse oscillator we made earlier to make a triangle shape like so:
The integrator must be reset upon each new gate input, otherwise the oscillator can suffer from DC bias. A future tutorial in this series will focus on the creation of a DC Trap to remove such problems, which can often result from bandlimited synthesis techniques, but for now it is easy enough to work around.
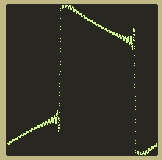
Here’s the resulting waveform:
One problem we see with this design in the resulting amplitude of the triangle wave is dependant upon it’s frequency (the lower the frequency, the louder the amplitude). However, this design flaw does not translate into our bandlimited version (I think the reason for this is the leaky integrator we’ll be using will cancel this effect out, but to be honest I’m not sure).
So, as before, we can extend our design to the bandlimited realm. To do so, simply take the pulse oscillator, and integrate it!
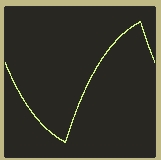
Integrating the output of another integrator might seem a little odd, but it works. As with the bandlimited pulse and sawtooth waves, the shape of the triangle is not exactly what you would expect:
It has more of a curved shape than you would expect from a triangle wave. However, as above, you will note that the spectral data obtained from the bandlimited triangle is almost identical to a standard triangle wave:
One interesting aspect of this design is that the W input to the macro now controls a morph between a triangle and sawtooth wave. When the width is equal to π, the oscillator outputs a triangle. As W decreases towards 0, the wave morphs into a sawtooth. However, decreasing W has the side effect of decreasing the amplitude as well. If the user wishes to use the morph feature, I would suggest adding in a method to boost the amplitude when the width is less than π.
CONCLUSION
Here is a .zip file containing the two new bandlimited structures in this tutorial. If you wish to modulate the pitch, I suggest you use Errorsmith’s fix to rebuild the structures, which should be quite simple.
I hope you have found this tutorial useful. If you have any suggestions for future tutorials on this topic, please let me know what you’d like to see covered.


 YOUTUBE