
FM8 Tutorials
Making a Hip-Hop Style Layered Orchestral Element in FM8
This is a great tutorial for those who are wanting to learn about different ways to layer sounds created in FM8 and how they can be used.
The purpose of this lesson is to provide some insight as to how you can go about designing sounds that appear to be much larger than they actually are. This allows you to spend less time on the sound design portion of your work flow, keep things simple and move onto to the task of making your music. This particular instrument we are making today is going to be a bit more orchestral in nature, compared to a lot of the sounds featured in our tutorials here. FM8 is incredibly diverse and we want to make sure we are giving a fair amount of attention to a wide range of possibilities when it comes to the type of sounds you can learn about here.
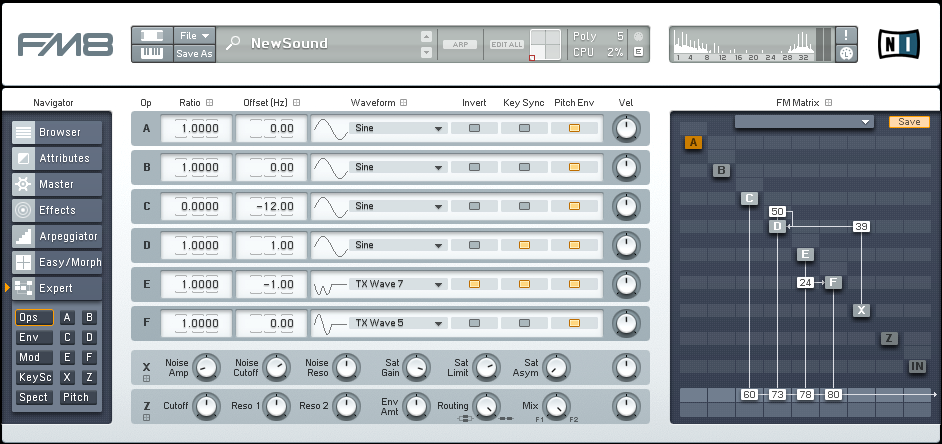
Let’s begin with the Expert Ops window and take a look at the operators used in this session. As you can see operator F is routed directly to the output, while operator E is routed both to the output and is also modulating operator F. Operator D is routed to the output mix after it has affected by both some noise (from operator X) and by some feedback from itself. Operator C is a simple sine wave that is dropped an octave to provide some low end presence and support.
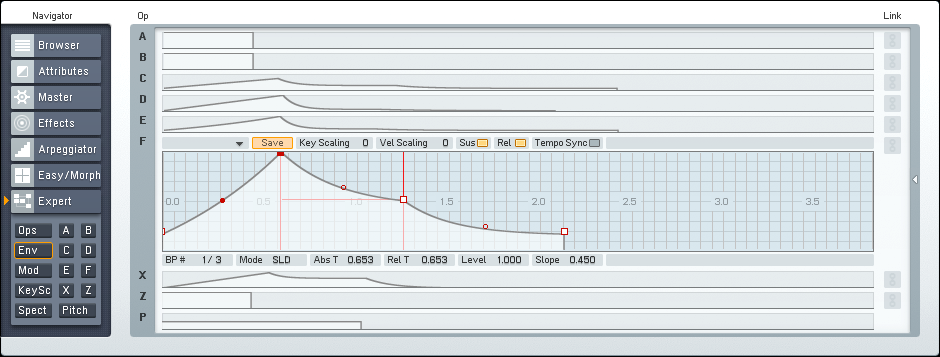
The envelopes of each operator has been set up with a longer attack and release, with a dip in the decay and sustain volumes. This gives our sound a nice orchestral pad like feeling. At this point we can take this sound in a lot of different ways, but I have something rather specific in store for it. I want some sounds that can really fill in a hip-hop/orchestral fusion piece, which is very popular in the commercial world these days.
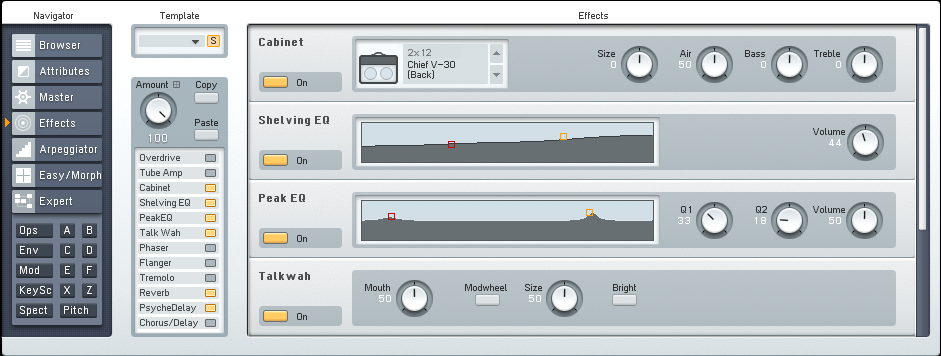
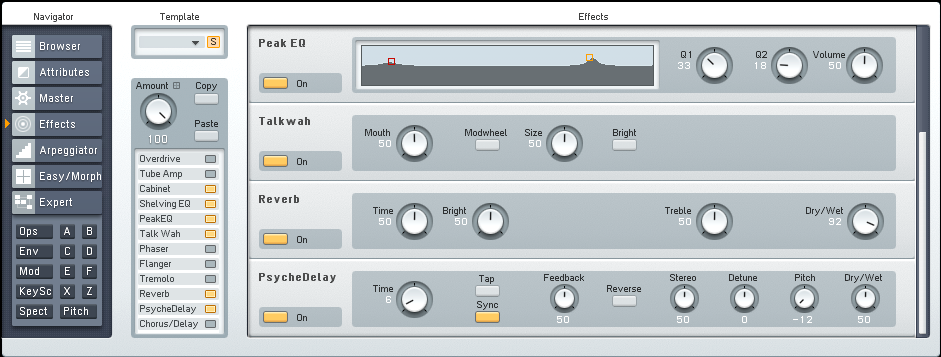
Although a small amount of movement and character has already been developed here, we need to go to the Effects window to really make this into what we want. Here I put six different effects into play, and it drastically changed the sound. First the Cabinet is used to wrangle in the synth a bit. The Shelving and Peak EQ modules are used to bring out some more of the brighter elements. The Talk Wah can be skipped if you are after more of a traditional sound, which in this case would retain more of the clarinet character showing through right now. I used the Talk Wah effect to give it more of a modern affected tone, which is great for genres like hip-hop. The Reverb is used to bring more space to the sound, and at this point it is a welcome addition because it was getting pretty flat. And lastly, the Psyche/Delay effect is used to create the second layer of our sound. The Pitch has been dropped an octave and Time parameter has been lowered to a value of six, making it appear that the second iteration of our sound is actually another sound that is backing up the first.
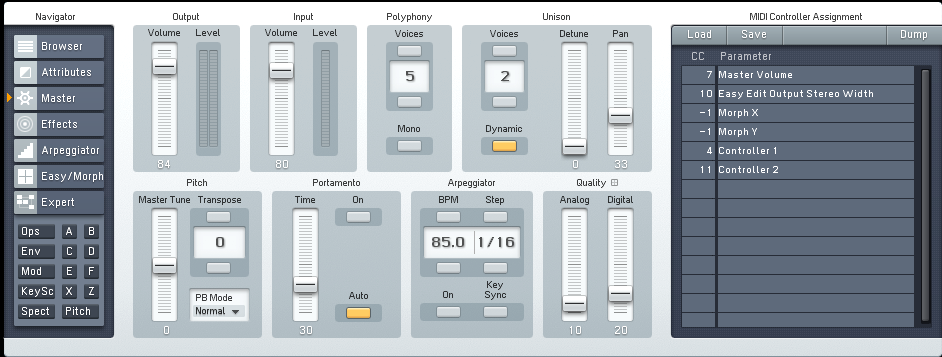
The last window we need to visit to finish our sound is the Master window. Here we bump up the Unison Voices to 2, lower the Detune parameter to 0 and increase the Pan value to about 33. The quality parameter has also been adjusted adding both Analog and Digital to the sound to make it fit the part a bit better.
In the end, I chose a lower BPM of 85 to showcase our sound. The first example below is the instrument on its own. The second audio example is with a few other instruments so you can actually hear it action. There has been no processing outside of FM8, so you should be able to accomplish the same sound yourself if you are following along. The slightest difference in the envelope and EQ settings can make a big different in the end, so do not be discouraged if yours is not an exact match. The important factor here is that you understand how to easily create a sound that has a supporting layer built into it, which is very useful in a wide range of music genres and styles.
[audio:https://www.fm8tutorials.com/wp-content/uploads/2012/06/Layered-Hip-Hop-Orchestral-Element-Solo.mp3|titles=Layered Hip Hop Orchestral Element Solo] [audio:https://www.fm8tutorials.com/wp-content/uploads/2012/06/Layered-Hip-Hop-Orchestral-Element-Full.mp3|titles=Layered Hip Hop Orchestral Element Full]I hope you enjoyed this quick tutorial and encourage you to get in touch with us if you have a request for specific tutorials in the future. Of course, if you want to share one of your own tutorial with the community, we’d love to hear from you and help you get those ideas in front of a larger audience. Thanks for stopping by!
Cheers,
OhmLab
 YOUTUBE