
Drums, FM8 Tutorials
Drum Synthesis With FM8: Hi-hat Sequencing with Arpeggiator
This is the final tutorial in the Drum Synthesis with FM8 series.
This time we will use FM8 arpeggiator to sequence hi-hat sound. Articulation and movement of a hi-hat sound is very important. Normally it takes some time to get it right in piano roll editor but with FM8 arpeggiator this is a matter of minutes.
With this tutorial also comes a small drum sound bank of sounds we have created in these past tutorials and also some other drum and percussion patches. You should use these patches as a starting point for customizing and developing your own drum sounds in FM8 rather than using them as they are.
You can download the drum sound bank here.
We will use the hi-hat sound we created in this tutorial.
You can download the hi-hat patch here.
Making a standard offbeat hi-hat
First we will create standard offbeat hi-hat.
Draw one two bars long C2 note in your MIDI track.
Enable the arpeggiator.
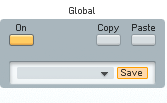
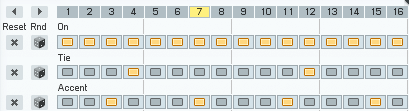
Set it to 16 steps long sequence with trigger on for every step.

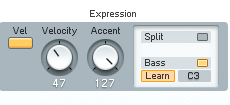
Also enable Vel button in the Expression window of the FM8 arpeggiator.
Set Velocity dial to zero and Accent button to 127.

Activate the steps which fall on the offbeat part of the sequence in the Accent row of the step sequencer.
So now every hi-hat that falls on the offbeat will be accented and the velocity of that step will be determined by Accent dial value.
![]()
Here we go, we have created simple offbeat hi-hat.
[audio:https://www.fm8tutorials.com/wp-content/uploads/2012/04/Hi-hat-Sequnced-Offbeat.mp3|titles=Hi-hat Sequenced Offbeat]Tie Parameter
If we want, we can also add a touch of variation to every offbeat hihat by using the tie parameter. I have explained how it works in this previous tutorial on drum sequencing.
Set the Tie parameter like this. This will make our first and third offbeat hi-hat slightly longer.
You can hear how small variation in length of the sound makes a huge difference.
[audio:https://www.fm8tutorials.com/wp-content/uploads/2012/04/Hi-hat-Sequnced-OffbeatVariation.mp3|titles=Hi-hat Sequenced OffbeatVariation]Now if we raise velocity slider we can also hear other hi-hat hits in the background.
We can now add some automation to the Velocity slider to add some interest to our sequence.
[audio:https://www.fm8tutorials.com/wp-content/uploads/2012/04/Hi-hat-Sequnced-Automation.mp3|titles=Hi-hat Sequenced Automation]
By adjusting the velocity sensitivity of each operators amplitude envelope we can get some cool variations.

Velocity and Key Scaling of the Envelopes
If you remember from the Hi-hat tutorial we have also used velocity and key scaling for our envelopes of each operator used.
So different key and velocity scaling settings affect the amplitude envelope length of each operator.
I have also set the Key and Vel values for each envelope in the patch you have downloaded.
The MIDI note pitch doesn’t affect the frequency of our sound because each ratio setting in every operator we are using is set to 0.
This means operator’s frequency is not determined by the note we play instead it is set by the offset value of every operator used.
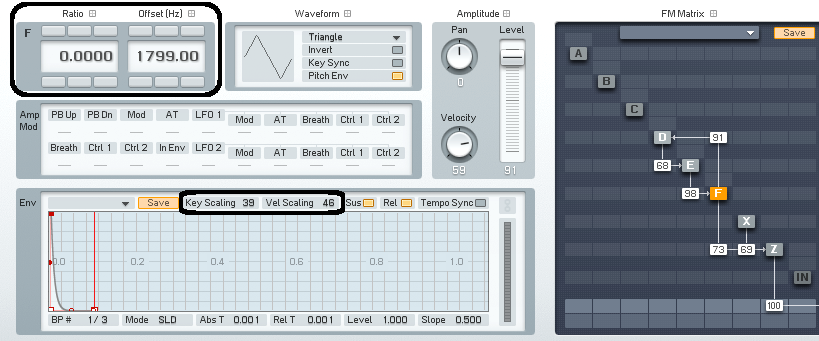
So we can use the pitch just for hi-hat articulation.
We can use Octave and Transpose row of the arpeggiator for adding variation to our sound.
Randomize the Octave row to get some movement in hi-hat sequence.
![]()
Note Order Parameter
We can take this even further by using note order row in our arpeggiator.
Remember, note row determines which notes are used when there are multiple notes played. You can read more on note order function here.
Go to your MIDI track and draw some additional notes like this.
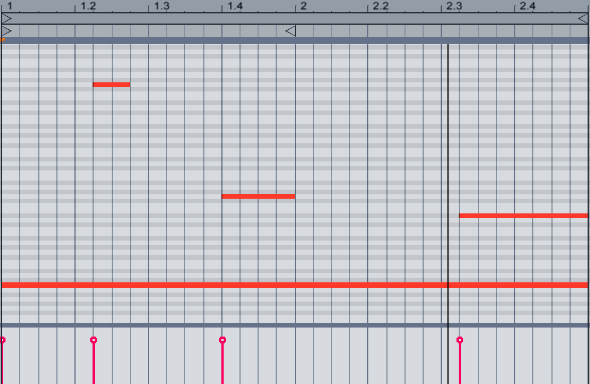
Randomize the note order now.
![]()
But when multiple notes are played this also affects the Tie parameter.
When two or more note are played note on messages are nevertheless generated even though the tie parameter is set to on. So by this you can create even more variations in your hi-hat sequence.
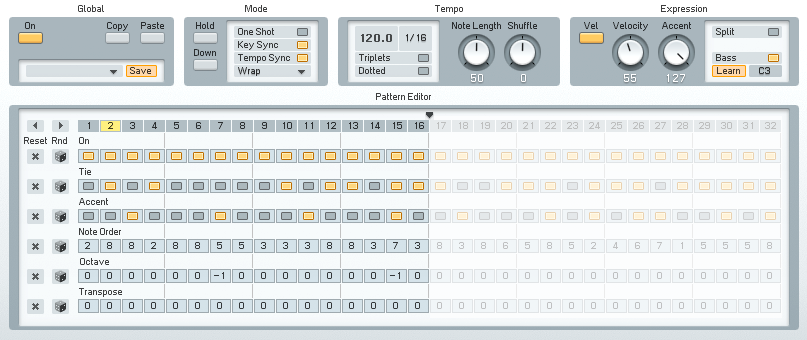
[audio:https://www.fm8tutorials.com/wp-content/uploads/2012/04/Hi-hat-Sequnced-Note-Order.mp3|titles=Hi-hat Sequenced Note and Octave Row ]Try setting the arpeggiator to something like this. To make things easier you can download the patch with these arpeggiator settings here.
Experiment a bit with all these settings, try to apply them carefully and you’ll get some very interesting results.
[audio:https://www.fm8tutorials.com/wp-content/uploads/2012/04/Hi-hat-Sequnced-Final-Variation.mp3|titles=Hi-hat Sequenced Final Variations]Also you can use shuffle function in Arpeggiator to match and improve the groove of your track.
Also try stacking some sampled sounds of the real hi-hats on top and maybe just use the ones from FM8 in the background. You can get some amazing results with this technique.
So this is it for Drum tutorial with FM8 series. Hope these tutorials have helped you in understanding the fundamentals of drum synthesis with using various frequency modulation techniques. Stay tuned for more tutorials.
If you have any question or comments feel free to leave them below.
Till next time,
Tonko
